Monday, November 3, 2014

The Lion, the Witch and the Wardrobe - Costume

I'm only posting about our costumes, because I searched the internet for ideas on a wardrobe costume and came up empty handed. So, maybe somebody else can find this and get some ideas. 

For our family costume theme this year we did: The Lion, the Witch and the Wardrobe. Clearly a Chronicles of Narnia inspired idea.

The lion costume came from Amazon for about $20. I had a black dress, and my mini witch hat was $8 and my gold leggings to match were $10 - all from Amazon as well. 

The wardrobe was made from two pieces of those cardboard project boards. The tri-fold ones. They were about $5 each from my local craft store.

We measured the width of my husband (person wearing the costume) and used a measurement that would still allow his hands to fold all the way around in front of him. 

We cut that measurement out of each middle section of the project boards to be the "base" of the wardrobe. We used the flaps and excess from the middle to make the "moldings."

My brother-in-law cut the molding out with curvy edges for an artistic effect. This was also just easier, in my opinion, because we didn't have to worry so much about straight edges. We cut out molding pieces to go along each side of the base, and then a wider pieces for the middle to be the doors. 

We traced one side of a bowl side by side to make the "mustache" top, and then just swooped it down and back out to a point - and this made the top of the wardrobe. 

Once all of those pieces were cutout as separate pieces, I glued them down onto the 'base' using wood glue. I glued all of the vertical pieces down first, and then the top and bottom pieces, and then the mustache top.

I let it dry overnight and then painted it using an acrylic paint in a cinnamon brown ($2), and I painted it on with a sponge brush ($2).

I only had to do one layer of paint, because the boys liked the sort of sketchy effect it had. They said it made it more wood like.

Grabbed some knobs and knob plates from my local hardware store (about a $10 purchase), and screwed them on after drawing a line down the middle for the doorway with a brown marker.

Then, just used some brown twine to make 'straps,' and taped it down on the front/back pieces of the wardrobe. 

And, tada! Costume!

It wasn't perfect, but it turned out pretty cute I thought. 

I wish I'd documented more details and done progress pictures (sorry). But, maybe this will be enough to get you in the right direction if you're trying to make a quick, easy, and fairly cheap wardrobe costume.

All in all the wardrobe costume itself was about $25. For the theme as a whole we were only out about $65. 

Pretty sweet, in my opinion. 


Because it's an artsy photo if you're going for the Narnia theme ;)


Thursday, October 16, 2014

Essential Oil Diaper Rash Cream

I have found a few uses for essential oils that I do believe have helped. Hopefully I'll get around to the details of all that, but today I'm here to share about a DIY diaper rash cream.

Sometimes, my little bug just very suddenly breaks out with a terrible diaper rash. Maybe it was a really intense poo, that just didn't get changed fast enough. But... yikes.

I always feel so terrible for him, too. It must be an extremely annoying and painful thing to overcome for little ones in diapers.

I'm not lying when I say, that I've put this concoction on him at bedtime and he has woken up with the diaper rash nearly gone. Still faint, but people, nearly gone!

The recipe is simple:

◼︎1/4 cup Coconut Oil
◼︎10 drops of Lavender (essential oil)

I fractionated the coconut oil (meaning I put it in a ziplock bag and ran it under warm water until it was melted. I added it to a small bowl, added 10 drops of lavender, put the lid on and gave it a few good shakes. It would eventually solidify again on it's own, but I did stick mine in the refrigerator to speed it up.
Coconut oil in general has odd characteristics. It's sort of a chunky solid, but becomes very runny when warmed up. So, applying to a baby's bum is probably nothing less of comical. Especially a wiggly child.

I just grab a little chunk of it and start rubbing it around until it melts enough to spread over the area.

Now, to be fair, I sometimes also apply a diaper rash cream over the oil - because diaper rash creams act as seals, right? So, you're sealing in the oil, while hopefully creating one against diaper moisture. But, I don't always use a store purchased ointment on top of the DIY one. It's your choice.

The success or lack thereof is most likely dependent on skin types and severity of the rash.

My personal list of brands for this recipe are below:

Coconut Oil (much cheaper from my local Trader Joes, but this is for the same brand on Amazon for $14.99)

Essential Oil: Lavender (from my personally trusted Edens Garden for $7.25)

Calmoseptine Ointment (store purchased cream that I sometimes use over the DIY oil for $7.99 - it's really great stuff)

Hope it works for your little one if they're in need of some relief!

Saturday, October 11, 2014

Bathtub Toy Basket

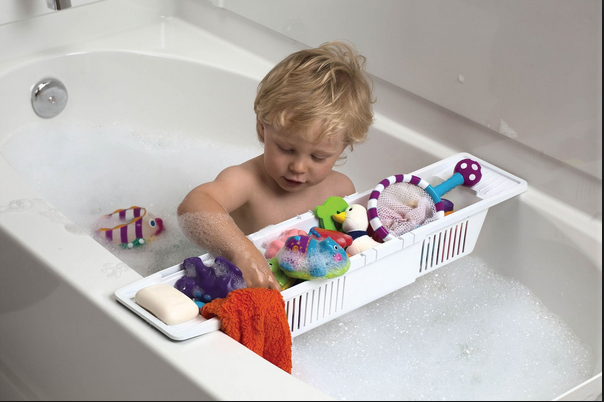
I've been utilizing this handy KidCo Toy Organizer for quite some time now:


I paid $15.29 for it from Amazon (get it here).

It's been a wonderful item to have, in my opinion. For one, I've yet to buy a spout cover for the bathtub. Mostly because this handy organizer, can easily be pushed in front of it, effectively blocking it off. 

It's not an enormous storage basket by any means. But, it holds plenty of things for a single bath time, and has nice separating pieces that can be adjusted to whichever slot you'd like them to be in.

The item as a whole is easily adjustable to different bathtub widths, and it stays at the adjustment you push it to pretty successfully. 

All in all, I feel it was a great purchase and would definitely recommend it to others.

Wednesday, October 8, 2014

Airbrush Makeup - Belletto Studio

I'm the faithful follower of a few youtube girls that are constantly giving me great ideas for hair and makeup. One of them reviewed a few different airbrush makeup kits, and that's when my obsession with airbrush makeup started.

I decided to go with Belletto, because of the brands said youtuber reviewed it came out on top in a lot of areas - and because she had a 50% off (!!) coupon for them. I'm not sure how long it will be valid for, but as of September 2014 it was still working. Coupon code: nicolexo

Initially the order process was smooth and quick. My anticipated package arrived just 4 days after placing my order.

Excitedly, I opened the package, carefully pulled out my products and was crushed with disappointment when I realized they'd sent the wrong foundation colors! I emailed them right away about the flaw. Within an hour someone called me, apologized and told me the correct items would be overnight shipped, and a few extras thrown in for me.

I was very impressed with this degree of customer service. The timing was such that an overnight shipment on Friday still wasn't going to make it to me until Monday though. So that sucked.

What sucked more was when Monday rolled around and no product showed up. Tuesday, and no product. Wednesday... and no product.

My faith in the company fell a bit. Because, in my opinion, if a package error occurs the best a company can do is overnight ship the correct items. So I was very satisfied with that being the case. Although it ended up not being the case. I finally got in touch with a customer service representative, and explained my frustrations. She told me that for (whatever reason) overnight shipping of things couldn't be done anymore. This just frustrated me more. For one, why not? Especially in the event that you're to blame for the mistake. Secondly, why the heck was I told it would be overnight shipped then?

Anyway... my correct items ended up arriving on Thursday - a week after receiving my initial product.

Onward to actual product:

It was very well packaged in a nice, visually appealing, white box.


Inside was a really nice, leather case holding the compressor, cords, airbrush gun, and educational dvd. I really love the case itself. Very convenient for travel and storing.  


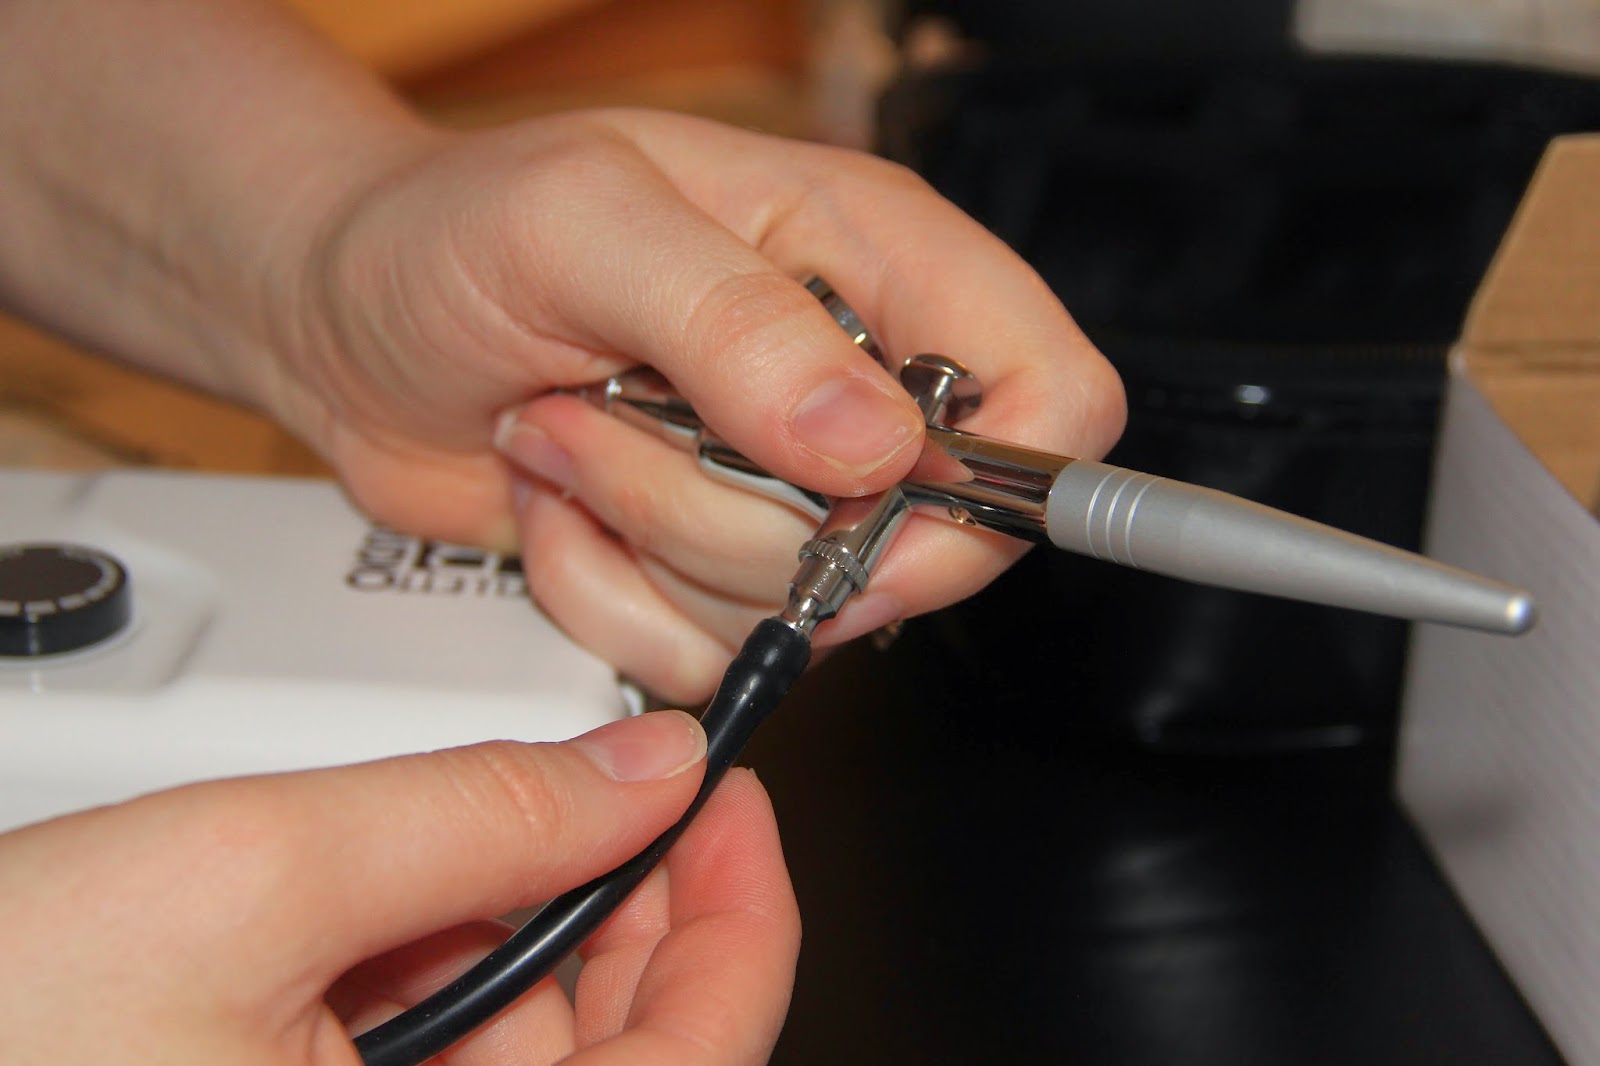
Hooking it all up was very simple. It was merely three attachments. Attaching air hose to the compressor.


Attaching power cord to compressor. 


And, attaching air hose to the airgun. 


The airgun holder slid effortlessly onto the side of the compressor and is another convenient feature.


The mesh top of the case can hold several foundation/makeup bottles. 


I did watch the educational video and some other youtube videos before my first attempt. Applying this makeup is so easy though. 


Just choose your color(s). I found that mixing 7 drops of F2p and 2 drops of F2y were my perfect shade (the foundations pictured ended up being too pale for me). I'm sure a lot of people can get away using a single color. I probably would be fine with just F2p. I just ended up liking the F2y addition with my undertones. That's another thing I love about this makeup - it's so easy to mix for a perfect shade. 


Just squeeze your drops into the liquid foundation compartment and you're ready to go. If mixing different colors, I always hold the tip while slightly pulling back the trigger to let it back bubble a bit for mixing. 


I also found that I basically never need to go higher than a low medium setting on the compressor. 


Though it may look awkward at first (I thought so), it's actually quite comfortable in your hand. It's very light and the trigger is very easy and giving to use. 


It usually takes a few passes over my entire face before I've used the amount of foundation in the airgun. I've found that 8-10 drops is really good coverage for me. I cannot stress how quick it is to apply this, or how light it feels on my face. I barely feel like I'm wearing any makeup at all! Most of the time, I don't apply anything else to my face (no concealer, no powder!). Just blush and eye makeup. 

However, if beneath my eyes are particularly dark or I have some more extreme blemishes, I will dab on some of my Nyx concealer first.

Cleanup is simple. Just add in drops of water, plug the tip with your finger, and pull the trigger to let some back bubbling wash out any remaining foundation. Spray it into a cup or cloth and repeat until your backwash is clear. It takes less than a minute. 

Below are some before and after pictures. Unfortunately they weren't taken on the same day. The first day I forgot to take the after photos and on Day 2 I forgot to take before pics. Ah, what ya gonna do? They're also not so great quality as they are cell phone pictures and crappy lighting, etc. Nonetheless, it does provide a comparison. I definitely had some blemishes/imperfections that I think the airbursh makeup did an excellent job covering. The makeup lasted all day too - like 10 hours later it still looked great. And, keep in mind, I didn't wear any concealer or any powder in these photos. Seriously. 

Overall, I'm pleased with the ease of use and quality of this product, and I have already recommended it to others. If you're considering airbrush makeup, I do believe Belletto is a great choice at a very reasonable price (comparatively).


Thursday, August 7, 2014

Essential Oils

I've had some family using essential oils for years and years. Over the past year or so I'd grown more and more interested in them as they kept coming up in other natural remedies I was looking for at the time. 

This year alone, I started reading about them a lot. Since I wasn't a distributor, already hesitant, and owned no oils at the time I feel like it made me a fairly objective researcher. 


I read a lot of blogs, emailed some professionals, got statements from different companies, looked at the research in what these oils even are, before making a decision to try utilizing any of them. 


First, I think aroma therapists get over looked in this area. It is their profession. So, if you're not taking their opinions seriously, then it's like ignoring your doctor's advice over the random person selling medical equipment/medicine. 


Secondly, every single company I looked at basically has false information put out. Example: "Pure Therapeutic Grade." 


These are terms that these companies literally have to go get trademarked because they're not true on the basis of testing. The FDA nor any other national organization runs organized testing on oils, thus not 'grading' them. So, just ignore these statements.  


One aroma therapist told me directly, and this statement was found in numerous other AT blogs I read: "Essential oils are not intended to be ingested." 


Some research even suggested ingesting citrus oils, can later cause scaring in esophagus and stomach lining. Because, yes, these oils are that potent. And they really should only be ingested with the guidance from a physician, and not the guidance of a company selling the oils. 


I compared the distilling process between: Young Living, doTerra, Mountain Rose Herbs, Eden's Garden, and Plant Life. 


According to the information available from each of these companies, the process was basically identical. 


I read in an AT's blog that you actually do not want to see the same exact oil being the exact same every time you order it. Because, this is plant life and it's never going to be identical twice. So, if your oil is 'identical' in every batch, then clearly the company is doing something to make it so. 


The best resource I found was from a 3rd party testing organization in France, who is trying to study the quality of essential oils. They got several EO companies to participate. They sent in their oils sealed and packaged exactly as they would be to a buyer. Someone then removed company labels and sent the bottles to their chemist being labeled with only numbers. Results are on nourishingtreasures.com and learningabouteos.com. It was nice to be able to look at these very unbiased results and see that all of these companies produced basically the same quality of oil (with like a .2% differential). The oils tested were Peppermint, Myrrh, Tea Tree. 


The companies that participated (in one study or another) were:

"Beyond the basics of Latin name and chemo type, we need to see GC/MS tests to verify the contents of the bottle and the quality of the contents." (learningabouteos.com)

So the compositions as per ISO were ran with GC/MS testing. 

With Tea Tree oil, the only company "Not in Compliance" with recommended levels was: Spark Naturals.

With Myrrh, all of the oil samples sent in were in compliance with recommended levels. 

With Peppermint, the only companies that were in compliance were: Essential Oil Exchange, Nature's Gift, and NYR - and all of the companies listed above participated in this one. So all of those other companies were not in compliance with recommended plant percentages. 

Pretty solid quality evidence, in my opinion. Also, pretty solid evidence that the batches of oils between these companies really do not vary all that much. I'm not saying there isn't any variance, because clearly there is. Also, clearly there are really terrible oils out there. So, just do your research. I'm of the opinion that most of the popular ones you're going to come across are perfectly acceptable oils. 

As far as organic goes:  "Ensuring organic status throughout the entire production process [of essential oils] is problematic and requires further investigation. At this time, testing of the end product is not required and is rarely done. Intentional and non-intentional contamination can occur at several points in the production process. Studies on Organic v. Non-Organic Essential Oils To date: there are no studies indicating that organic essential oil is superior to non-organic essential oil."  (57aromas.com)

Per suggestion of numerous aroma therapist blogs, I focused on companies like Mountain Rose, Eden's Garden, and Aromatics International (they have archived and current GC/MS testing right on their website!).

If you're worried about costs, because I did read comments like, "They're cheap, they must be low quality," that simply isn't true. If you don't believe me, do the research yourself. MLM companies have money going to several different people, and that's why they're expensive. 

Some companies cut out the middleman. Since my research provided valid (enough) evidence that the quality of these oils, between the companies I was looking at, were of extremely similar ranges, I just decided to go with not paying more when I could pay less for the same thing.

I know a lot of people are pretty hard-core about the company they buy from, but I'm pretty open and will probably buy from a few of the ones suggested by aroma therapists. 

I'll keep you posted on some of my topical experiences though and if I feel I've benefited from the magical oil powers of plants ;)

http://www.learningabouteos.com/index.php/2013/08/04/why-we-perform-3rd-party-gcms-testing/

Tuesday, August 5, 2014

Child Proofing

I have a 17 month old and I'm just now child proofing some things. I think it's safe to say I like procrastinating the inevitable. 

For the most part, I don't mind my son wandering around the house and rearranging stuff. But, recently, he's proven some of these aren't ideal for his safety. 

So I finally ordered these:


You know I ordered them from Amazon, right? (here)

These are a bit on the expensive end when compared to other kinds and brands. I got a 10 pack for $25, I'm of the opinion that they're worth it though.

I love these. I think they're amazing and extremely versatile. I had read some problems people were having with the sticky part actually sticking, but I've had no problems with this and have these stuck to various different surfaces. 

Hopefully it's known to clean the area before sticking it - if not... clean the area before sticking it. I used vinegar, alcohol would also work. Just give the area a quick rub down, let it dry and stick your little straps down. Ready to go. 

I have some cabinets that are grooved in such a way that my sticky part couldn't make solid contact with the surface throughout. Even those have held up to the violent pullings of my toddler. 

Still, these get the most love because they're so universal. I didn't have to hunt down cabinet locks, then trash can locks, then drawers locks, etc. If whatever you're needing to secure doesn't exceed the length of the strap, then these will do the job. 


Tuesday, July 29, 2014

Snack Cup

I'm not all that big on the idea of letting kids just snack whenever. But from time to time, I will give my toddler a small portion of puffs or crunchies (let's face it, there isn't much to either of those snacks anyway) to keep him satisfied while I finish a chore. 

I tend to love OXO products. I have some OXO cups, silverware, bowls, plates, baby food containers, and who knows what all else.

So, I was disappointed when I purchased the OXO Tot snack cup. It's a clean, cute design like most of their products. I like that's it's clear, and my toddler could easily hold it by its handle. However, the flaps on this cup top aren't nearly flexible enough. Heck, I thought it was hard myself to reach through the stiff flaps and achieve the goal of actually pulling my hand back out with food still in it. I mean, I'm all for things that work fine motor skills on kids, but my kid would get so frustrated with this cup that he'd end up just throwing it down and not wanting it. 


On Amazon (here) it's listed at $5.99. I found the one I have for $3.99 at a local baby shop though, so they can probably be found at a better price. 

Due to my toddler's inability to use this cup, I hunted for a different brand. I purchased a set of two Munchkin snack cups for somewhere around the same price as the single OXO ($5). The Munchkin snack cups are $4.47 as an add-on with Amazon (here). 

These cups are much easier for my toddler to use. They're a bit larger in size, but that wasn't a hinderance. The handles are nice and my toddler usually holds the cup by them. The flaps are a more flexible rubber, and much easier for my kid to use successfully. Plus, having two of them is nice. 


Though these are the only two toddler snack cups we've used, I'd definitely recommend the Munchkin cups to anyone with toddlers. 

Thursday, June 12, 2014

Poly-Vi-Sol

Before I'd even had my son, my Pediatrician had mentioned vitamin supplements. Once he had arrived, she mentioned them several more times thereafter. 

If you're the parent of an infant/toddler, these are a must! I was surprised by how many of my other parent friends hadn't been informed of an infant/toddler vitamin by their doctors.

Poly-Vi-Sol is what we use:


I usually find it easily at most Target stores I visit, but like most things, have taken to purchasing it from Amazon (here). 

Tuesday, May 13, 2014

Homemade Cream Soda

Drinking soda is a rare treat for me, so I've really gotta make it count when it happens. I've tried a few homemade cream soda recipes before, but the one I'm about to share is by far superior to all others I have tried. 


1 cup of club soda
1/4 - 1/3 cup of vanilla syrup (like coffee aisle syrup or make one similar to this recipe)
2 tbsp of half and half
Put a nice mound of whip cream on top (yum!)

Tada! Cream soda. Enjoy :)

Monday, April 14, 2014

Menu Planner

I'm all about menu planning. I like not having to guess what's for dinner on any given night of the week. I like knowing exactly what groceries I need to purchase at the store, to limit excessive and unnecessary purchases.

There are lots of different ways to go about this, and a wealth of apps and websites to help. But, I made a very simple template that I just print and fill out each week. 

So, I thought I'd share it: download template here

I use a full page, utilizing the top half for my and the hubby's menu and the bottom half for the little one's menu. Soon enough, they'll be completely merged, but until they are, it's helpful having the two separate menus on the same page. 

Here's an example of what it looks like (mind you, this week's menu is pretty sloppy, but you get the picture):


Wednesday, April 9, 2014

1-Year-Old Menu

I've been asked a few times lately about what I'm feeding my little one these days. I decided to share a few of the menu options I have in place at this time.

With breakfast, snacks, and dinner I give 4 ounces of milk. For lunch, I offer water - as well as sips of water throughout the day as wanted. 

Breakfast options:

  • Oatmeal
  • No sugar, banana/blueberry muffin
  • Scrambled egg
  • Toast (with a bit of butter)
  • 1/4 Cup of cereal
  • Chopped fruit (strawberries, bananas, oranges, peaches, cantaloupe, etc)
  • Bagel (with cream cheese)

Snack options:

  • Organic animal crackers
  • Organic fruit/veggie squeeze pouch
  • Mango and sweet potato chunks (1/4 cup of each)
  • Steamed carrots with a bit of ranch
  • 1/2 Cinnamon toast
  • 1/2 Banana
  • Grapes
  • String cheese
  • Puffs/yogurt melts (on occasion)
  • 1/8 Cup yogurt

Lunch options:

  • 1/2 Sandwich (variety: turkey/cheese, strawberry/cream cheese, sloppy joe, PB&J)
  • 1/4 Cup vegetable (green beans, peas, carrots, sweet potato, etc.)
  • 1/8 Cup organic applesauce
  • 1/8 Cup tomato soup
  • 1/2 grilled cheese
  • Zucchini bread
  • Cheese

Dinner options:

  • Pasta (with tomato sauce)
  • Cheese ravioli 
  • 1/4 cup chicken/fish
  • 1/8 cup vegetable
  • 1/8 cup fruit
  • Black/pinto/white beans (cooked and cut in half)

My 1-year-old's eating schedule is:

8:15am - Milk, Breakfast
11:15am - Milk, Snack
1:15pm - Water, Lunch
3:45pm - Milk, Snack
6:30pm - Milk, Dinner

Anyway, just a few ideas of things to feed your little ones :)

Friday, January 17, 2014

Hair Care

It's been forever, Friends. Too long. I don't want to lie and say, "I'm back," but I am trying to be more dedicated to blogging. Mainly, because I really like it. The other part of it is that I like to document things.

Today's post is about hair care. See, though I deny any degree of OCD, I do like for all my things to match. Ya know like the shampoo, conditioner, heat set, hair spray, etc. Yes, I know that sounds crazy. But, I've looked into so many brands that have the whole set of hair care to styling. I've yet to find one that fits. Guess my brain's going to have to learn to live with that one.

Since my search for one brand that meets all my needs has failed, today's focus is really on hair care and not styling. A year or so ago I got pretty involved in actually taking care of my hair and not just grabbing whatever shampoo looked appealing at the time. 

I've tried Tresemme, Dove, Pantene, Sauve, and to save you a bunch of blah-blah, probably everything on the shelf at a Target store. 

Then, the YouTube girl that I follow did a video on her hair care routine. That's when I tried an expensive new shampoo/conditioner and fell in love! The Natural Macadamia Oil brand. 

After trying it I was pretty sure I was a dedicated user, but I decided to stray to try a few other brands before settling. 

I tried some John Frieda shampoo/conditioner that I'd definitely place at the top of my list, but still didn't give me the silky, shiny, feel-good results from the macadamia oil brand.

Next, I tried the Organix brand of Macadamia oil stuff, hoping macadamia oil was really the key. I liked it better than John Frieda, but it still just didn't perform like the competition (however, I would put this as my second choice). 

I actually read in a magazine that Herbal Essences were among the top picks for hair care products. So, I decided to give them go. And let me just say... yuck. My hair felt dry and stiff after a few days of these shampoos - comparatively.

So, I'm returning to my first macadamia oil hair care product. I know they're expensive (20-30 bucks a pop at Target), and of course I'd recommend Amazon over in-store purchases because they're cheaper, but this is the best stuff I've ever used:


I've used the shampoo ($13 on Amazon - caught it for $10 once), moisturizing rinse ($13), and deep repair masque ($17). I'm singing their praises, so if you're interested in giving them a try check 'em out here: shampoo,  moisturizing rinse,  repair masque