Saturday, June 20, 2015

Kismet - Young Adult Romance, Paranormal, Fiction, eBook

I wrote a book. I'm proud of it, too. It's been a fun - and challenging - process, and I'm so happy that it's completed and published.


Synopsis: Michael Clarkton is a small town graduating college senior. He feels alone in the world, living with the ability to manipulate the fabric of reality with his thoughts. A childhood of disbelieving parents and a lot of doctors force him into a life of secrecy. But when he falls into an unexpected love with Rylan, his gifts are rekindled.  
As he's navigating this new relationship, Michael is recruited into a secret organization of operatives with similar powers. They're fighting a war - a war against a massive intelligence apparatus with enormous resources.  
Just as life starts falling into order, Rylan's connection to the agency bent on eradicating Michael's kind will unleash chaos. This revelation will force loyalties and push the limits of their budding romance.  
Can a forbidden love survive the odds stacked against it? Or will a new love come between them? What will Michael's role be in the line of duty with his kind?

Visit my website for purchasing information. 

Happy Readings :)

xo

p.s. 

Keep an eye out, because there is more to come...


Tuesday, May 19, 2015

Menstrual Cramping / PMS

An odd topic, but here it goes:

I haven't been on any kind of oral/prescribed birth control in many many years. When I was first put on a birth control pill I had numerous issues. Things from weight gain and acne to mood swings and all the in-betweens. After switching brands five different times, I decided it wasn't worth it. Plus, all the hormones in those things, I just didn't want to subject my body to it any longer.

It took my body well over a year to regulate even a little bit, and another year before it balanced out into what I say is a regular cycle - sometimes. Still, I'd rather deal with it this way than the alternative.

I said all of that to say this: On the first day of my cycle, I have severe cramping. Like, get-me-a-heat-pad-while-I-lay-in-the-fetal-position-for-a-couple-of-hours cramping. Not to mention how much the discomfort adds to my mood swings and irritability.

I recently visited a doctor for this, to determine my options without going back onto a birth control pill/shot.

She told me something interesting that I'd never heard before. She said that most women, naturally, don't take pain medicine for cramping until its onset. However, your tubes and uterus can start becoming inflamed and irritated a whole day before you become symptomatic to it - and before your little red friend even shows up.

So, she prescribed me a glorified 800 mg ibuprofen and told me to take one pill twice a day (in the morning and evening) up to three days before my expected period. Since my cycle lasts anywhere between 29-31 days, it is often challenging to time it correctly. However, I do track my cycle via a phone app, and so around day 28-29 I will start taking the anti-inflammatory as directed.

And, wow! What a difference it has made! Like just... wow.

Now, I do still feel some mild discomfort sometimes and a few times my timing of taking the anti-inflammatory just didn't line up. But, the difference is amazing and worth it. Since this is something I'd never heard of doing before a few months ago, I figure maybe that's true for others suffering through their periods.

So, if you experience those dreadful monthly cramps, taking an anti-inflammatory up to 3 days before your period starts is something you should definitely try!

Monday, February 9, 2015

Kinderkord Parent/Child Restraint/Attachment (Child Leash)

I know people have mixed feelings about child 'leashes,' but I'm going to call it like it is: they're awesome. 

Admittedly, I don't like the bulky, weird animal backpack ones, but that's just me.

I found this wrist connecting one and ordered it without high expectations:


Kinderkord Parent and Child Safety Restraint Set


You know I got it from Amazon right? It was $13.41 (get it here).

This is a product that keeps a parent connected to their child via a wrist band that both the parent and child wear. It reminds me of those thick rubber(ish) watches. 

I ordered it when my son was just 20 months old and had no idea how well the child band would fit his tiny wrists, but the smallest adjustment fit him perfectly (and he's a small kid, too).  

He never seems that bothered to be wearing it either. That could be because he started getting exposure to it when he was 20 months old, but the cords on each band are retractable and it's awesome to not deal with extra slack. The tug of the retractable cord is very minor - like that of those retractable name badges. 

There are a few different lengths to choose from, too. If you connect the two cords together, it's a total of 3 feet in length. You can also connect the parent cord directly to the child wrist band, which takes it down to 2 feet. Or you can connect the child cord directly to the parent band for a length of 1 foot.

I love that this gives curious toddlers an opportunity to be down walking on their own, but also the comfort and safety of not being able to actually wonder off. 

I feel it's an ideal "child leash" system, and would recommend it to anyone interested in a product to serve this purpose. 

For someone who lives in a big city, it's a must have in my book! 

Monday, November 3, 2014

The Lion, the Witch and the Wardrobe - Costume

I'm only posting about our costumes, because I searched the internet for ideas on a wardrobe costume and came up empty handed. So, maybe somebody else can find this and get some ideas. 

For our family costume theme this year we did: The Lion, the Witch and the Wardrobe. Clearly a Chronicles of Narnia inspired idea.

The lion costume came from Amazon for about $20. I had a black dress, and my mini witch hat was $8 and my gold leggings to match were $10 - all from Amazon as well. 

The wardrobe was made from two pieces of those cardboard project boards. The tri-fold ones. They were about $5 each from my local craft store.

We measured the width of my husband (person wearing the costume) and used a measurement that would still allow his hands to fold all the way around in front of him. 

We cut that measurement out of each middle section of the project boards to be the "base" of the wardrobe. We used the flaps and excess from the middle to make the "moldings."

My brother-in-law cut the molding out with curvy edges for an artistic effect. This was also just easier, in my opinion, because we didn't have to worry so much about straight edges. We cut out molding pieces to go along each side of the base, and then a wider pieces for the middle to be the doors. 

We traced one side of a bowl side by side to make the "mustache" top, and then just swooped it down and back out to a point - and this made the top of the wardrobe. 

Once all of those pieces were cutout as separate pieces, I glued them down onto the 'base' using wood glue. I glued all of the vertical pieces down first, and then the top and bottom pieces, and then the mustache top.

I let it dry overnight and then painted it using an acrylic paint in a cinnamon brown ($2), and I painted it on with a sponge brush ($2).

I only had to do one layer of paint, because the boys liked the sort of sketchy effect it had. They said it made it more wood like.

Grabbed some knobs and knob plates from my local hardware store (about a $10 purchase), and screwed them on after drawing a line down the middle for the doorway with a brown marker.

Then, just used some brown twine to make 'straps,' and taped it down on the front/back pieces of the wardrobe. 

And, tada! Costume!

It wasn't perfect, but it turned out pretty cute I thought. 

I wish I'd documented more details and done progress pictures (sorry). But, maybe this will be enough to get you in the right direction if you're trying to make a quick, easy, and fairly cheap wardrobe costume.

All in all the wardrobe costume itself was about $25. For the theme as a whole we were only out about $65. 

Pretty sweet, in my opinion. 


Because it's an artsy photo if you're going for the Narnia theme ;)


Thursday, October 16, 2014

Essential Oil Diaper Rash Cream

I have found a few uses for essential oils that I do believe have helped. Hopefully I'll get around to the details of all that, but today I'm here to share about a DIY diaper rash cream.

Sometimes, my little bug just very suddenly breaks out with a terrible diaper rash. Maybe it was a really intense poo, that just didn't get changed fast enough. But... yikes.

I always feel so terrible for him, too. It must be an extremely annoying and painful thing to overcome for little ones in diapers.

I'm not lying when I say, that I've put this concoction on him at bedtime and he has woken up with the diaper rash nearly gone. Still faint, but people, nearly gone!

The recipe is simple:

◼︎1/4 cup Coconut Oil
◼︎10 drops of Lavender (essential oil)

I fractionated the coconut oil (meaning I put it in a ziplock bag and ran it under warm water until it was melted. I added it to a small bowl, added 10 drops of lavender, put the lid on and gave it a few good shakes. It would eventually solidify again on it's own, but I did stick mine in the refrigerator to speed it up.
Coconut oil in general has odd characteristics. It's sort of a chunky solid, but becomes very runny when warmed up. So, applying to a baby's bum is probably nothing less of comical. Especially a wiggly child.

I just grab a little chunk of it and start rubbing it around until it melts enough to spread over the area.

Now, to be fair, I sometimes also apply a diaper rash cream over the oil - because diaper rash creams act as seals, right? So, you're sealing in the oil, while hopefully creating one against diaper moisture. But, I don't always use a store purchased ointment on top of the DIY one. It's your choice.

The success or lack thereof is most likely dependent on skin types and severity of the rash.

My personal list of brands for this recipe are below:

Coconut Oil (much cheaper from my local Trader Joes, but this is for the same brand on Amazon for $14.99)

Essential Oil: Lavender (from my personally trusted Edens Garden for $7.25)

Calmoseptine Ointment (store purchased cream that I sometimes use over the DIY oil for $7.99 - it's really great stuff)

Hope it works for your little one if they're in need of some relief!

Saturday, October 11, 2014

Bathtub Toy Basket

I've been utilizing this handy KidCo Toy Organizer for quite some time now:


I paid $15.29 for it from Amazon (get it here).

It's been a wonderful item to have, in my opinion. For one, I've yet to buy a spout cover for the bathtub. Mostly because this handy organizer, can easily be pushed in front of it, effectively blocking it off. 

It's not an enormous storage basket by any means. But, it holds plenty of things for a single bath time, and has nice separating pieces that can be adjusted to whichever slot you'd like them to be in.

The item as a whole is easily adjustable to different bathtub widths, and it stays at the adjustment you push it to pretty successfully. 

All in all, I feel it was a great purchase and would definitely recommend it to others.

Wednesday, October 8, 2014

Airbrush Makeup - Belletto Studio

I'm the faithful follower of a few youtube girls that are constantly giving me great ideas for hair and makeup. One of them reviewed a few different airbrush makeup kits, and that's when my obsession with airbrush makeup started.

I decided to go with Belletto, because of the brands said youtuber reviewed it came out on top in a lot of areas - and because she had a 50% off (!!) coupon for them. I'm not sure how long it will be valid for, but as of September 2014 it was still working. Coupon code: nicolexo

Initially the order process was smooth and quick. My anticipated package arrived just 4 days after placing my order.

Excitedly, I opened the package, carefully pulled out my products and was crushed with disappointment when I realized they'd sent the wrong foundation colors! I emailed them right away about the flaw. Within an hour someone called me, apologized and told me the correct items would be overnight shipped, and a few extras thrown in for me.

I was very impressed with this degree of customer service. The timing was such that an overnight shipment on Friday still wasn't going to make it to me until Monday though. So that sucked.

What sucked more was when Monday rolled around and no product showed up. Tuesday, and no product. Wednesday... and no product.

My faith in the company fell a bit. Because, in my opinion, if a package error occurs the best a company can do is overnight ship the correct items. So I was very satisfied with that being the case. Although it ended up not being the case. I finally got in touch with a customer service representative, and explained my frustrations. She told me that for (whatever reason) overnight shipping of things couldn't be done anymore. This just frustrated me more. For one, why not? Especially in the event that you're to blame for the mistake. Secondly, why the heck was I told it would be overnight shipped then?

Anyway... my correct items ended up arriving on Thursday - a week after receiving my initial product.

Onward to actual product:

It was very well packaged in a nice, visually appealing, white box.


Inside was a really nice, leather case holding the compressor, cords, airbrush gun, and educational dvd. I really love the case itself. Very convenient for travel and storing.  


Hooking it all up was very simple. It was merely three attachments. Attaching air hose to the compressor.


Attaching power cord to compressor. 


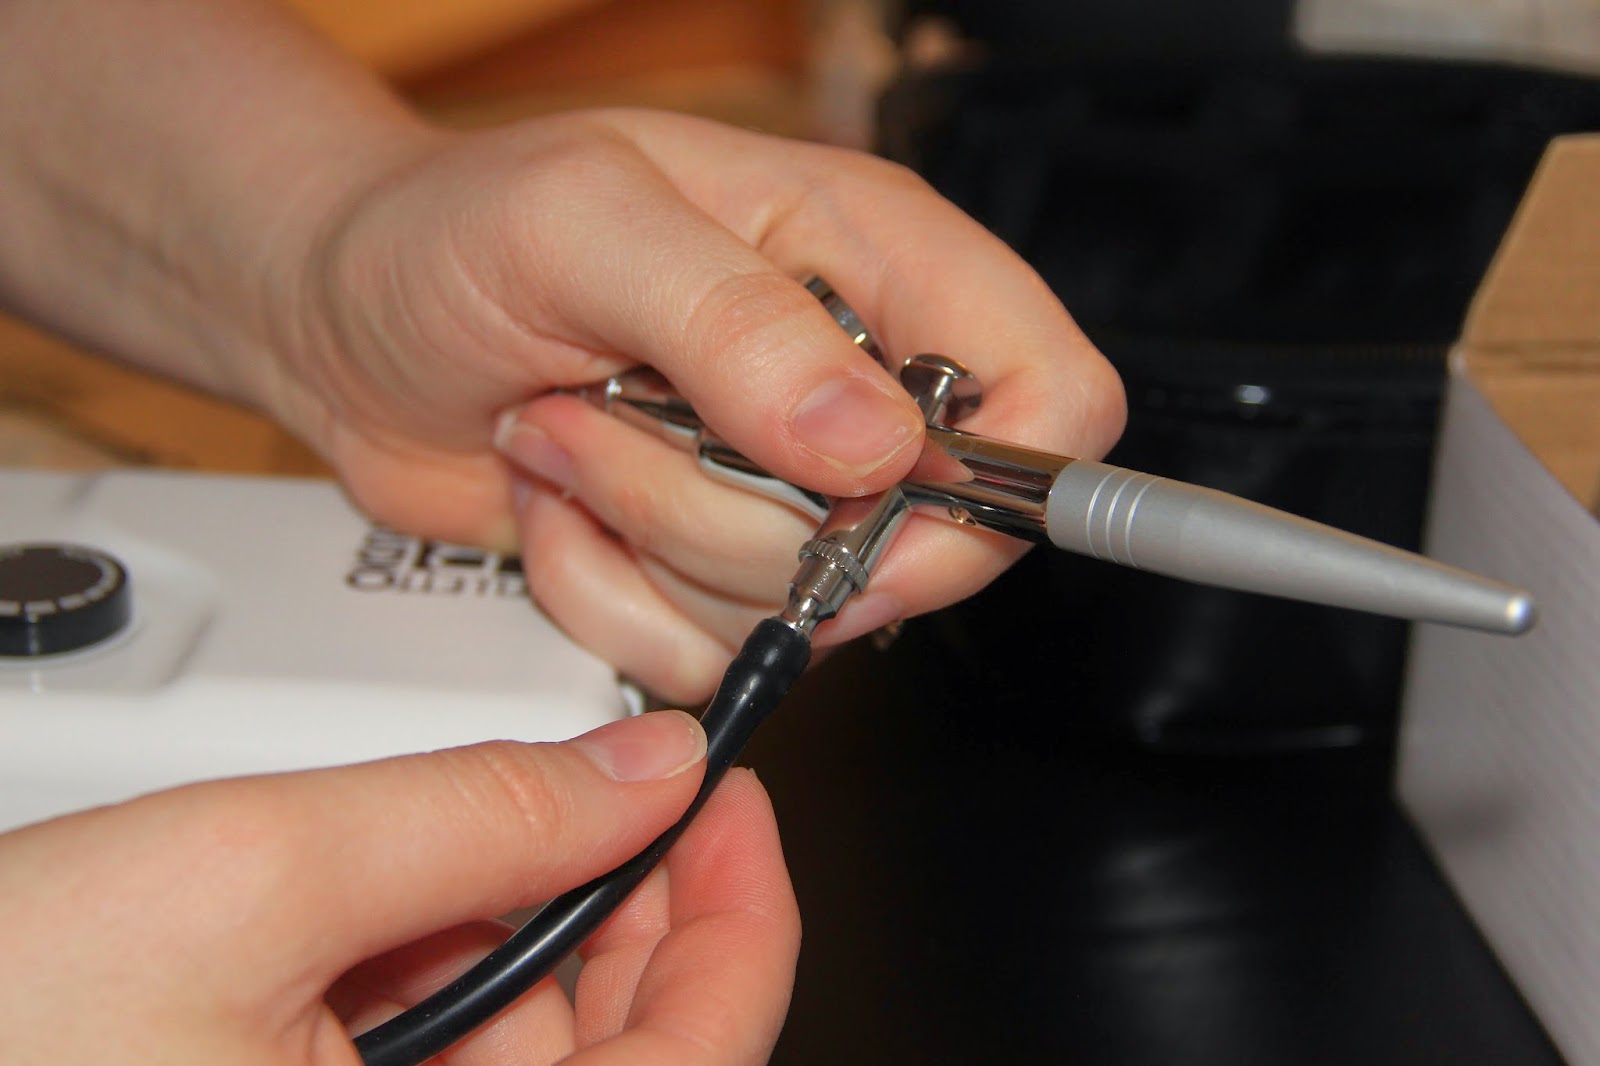
And, attaching air hose to the airgun. 


The airgun holder slid effortlessly onto the side of the compressor and is another convenient feature.


The mesh top of the case can hold several foundation/makeup bottles. 


I did watch the educational video and some other youtube videos before my first attempt. Applying this makeup is so easy though. 


Just choose your color(s). I found that mixing 7 drops of F2p and 2 drops of F2y were my perfect shade (the foundations pictured ended up being too pale for me). I'm sure a lot of people can get away using a single color. I probably would be fine with just F2p. I just ended up liking the F2y addition with my undertones. That's another thing I love about this makeup - it's so easy to mix for a perfect shade. 


Just squeeze your drops into the liquid foundation compartment and you're ready to go. If mixing different colors, I always hold the tip while slightly pulling back the trigger to let it back bubble a bit for mixing. 


I also found that I basically never need to go higher than a low medium setting on the compressor. 


Though it may look awkward at first (I thought so), it's actually quite comfortable in your hand. It's very light and the trigger is very easy and giving to use. 


It usually takes a few passes over my entire face before I've used the amount of foundation in the airgun. I've found that 8-10 drops is really good coverage for me. I cannot stress how quick it is to apply this, or how light it feels on my face. I barely feel like I'm wearing any makeup at all! Most of the time, I don't apply anything else to my face (no concealer, no powder!). Just blush and eye makeup. 

However, if beneath my eyes are particularly dark or I have some more extreme blemishes, I will dab on some of my Nyx concealer first.

Cleanup is simple. Just add in drops of water, plug the tip with your finger, and pull the trigger to let some back bubbling wash out any remaining foundation. Spray it into a cup or cloth and repeat until your backwash is clear. It takes less than a minute. 

Below are some before and after pictures. Unfortunately they weren't taken on the same day. The first day I forgot to take the after photos and on Day 2 I forgot to take before pics. Ah, what ya gonna do? They're also not so great quality as they are cell phone pictures and crappy lighting, etc. Nonetheless, it does provide a comparison. I definitely had some blemishes/imperfections that I think the airbursh makeup did an excellent job covering. The makeup lasted all day too - like 10 hours later it still looked great. And, keep in mind, I didn't wear any concealer or any powder in these photos. Seriously. 

Overall, I'm pleased with the ease of use and quality of this product, and I have already recommended it to others. If you're considering airbrush makeup, I do believe Belletto is a great choice at a very reasonable price (comparatively).